Installing a rear facing camera is not a hugely difficult task on an Abarth 595 / Fiat 500 and there are several Youtube videos on the topic, however I found they all seem to gloss over a few key items which I will cover here.
1. Fuse taps / orientation / polarity / series vs. parallel - it's an important thing
2. Partial headliner removal - how to take out the coat hook (don't just pull it!)
3. Passing the wire into the hatch area
First, most of these systems require a 12V battery connection ("always on") and a 12V accessory connection ("only on when the key is in the accessory/on position"). Fortunately these are easy to access via fuse taps in the interior fuse panel. My car is a RHD version, so the glovebox is on the left and behind it is a panel which hides the fuses.

In the Abarth/Fiat (see photo above), the fuses on the left column as well as both bottom two 20A fuses are always on ("Battery") while the rest are only on with the key ("Accessory"). Fuse taps are very common, easy to find in the usual places, convenient and allow you to add accessories without modifying the wiring. But they have an important flaw/bug that you need to be aware of.
A fuse tap will work in either direction, facing left or right, but in one orientation the two fuses are in series and in the other they are parallel. You want to avoid using the series configuration because the smaller fuse will blow first and take out both circuits - For example, in the case of the 5A fuse (refer this diagram - which is a sideways version of the photo above) for the stop lights and instrument panel, adding a 50W UHF CB radio (which can draw 8A) via a fuse tap will blow out your stop lights and instrument panel every time you use the radio if wired in series.
To make sure you install the fuse tap in parallel, follow these steps:
1. Remove the existing fuse - and do not plug it into the fuse tap
2. Insert the fuse tap (with its pre-existing fuse, but without the fuse from step 1) and test for voltage on the pigtail - if no voltage, turn it around and put in the other way.
Once you have confirmed that you have voltage on the pigtail, you can then insert the existing fuse into the blank spot on the fuse tap.
Annoyingly, because of the configuration of the fuse panel (the metal plate on the left and the plastic shape of the fuse panel which protrudes), I was unable to follow my own advice.

I went looking for fuse taps wired with the pigtail facing the other direction but they don't seem to exist. So for now I've left it like this mess, but have ordered this item to allow me to wire it correctly (it will give much more space and allow me to wire in parallel. I'll have to wait for that part to arrive but until then it will be mis-wired in series).

The next issue is running the wiring. There is actually plenty of space in the front to just tuck it behind the rubber seals and headliner just with a plastic trim tool like these: https://www.amazon.com.au/Automotive-Trim-Tools/b?node=4958954051
For the rear camera, you need to get the cable through to the hatch. The easiest way to is drop the back of the headliner a bit. Again, this is easy with the plastic trim tool I linked in the last paragraph where you just pry it out... EXCEPT... you cannot pry out the coat hook.

You need to turn the coat hook counterclockwise about 45 degrees and then it will pull out. You may need to use pliers to grab it.

Here are some additional photos to show how it works (click to enlarge).


Once you've removed the plug and the coat hook, you can simply pull out the plastic C pillar trim piece as well and gain access to the inside where you can pass the cable through.
The last step was getting the cable into the hatch itself. The difficult part here is to pass it through the rubber boot. The boot already has all sorts of problems (simply Google all the issues with frayed wiring and broken lights, hatch release, blown fuses, etc. caused by these frayed wires. It's a bad problem). My relatively new car already had this issue only a few years into its use which I had to repair. Here is a photo from before the repair:
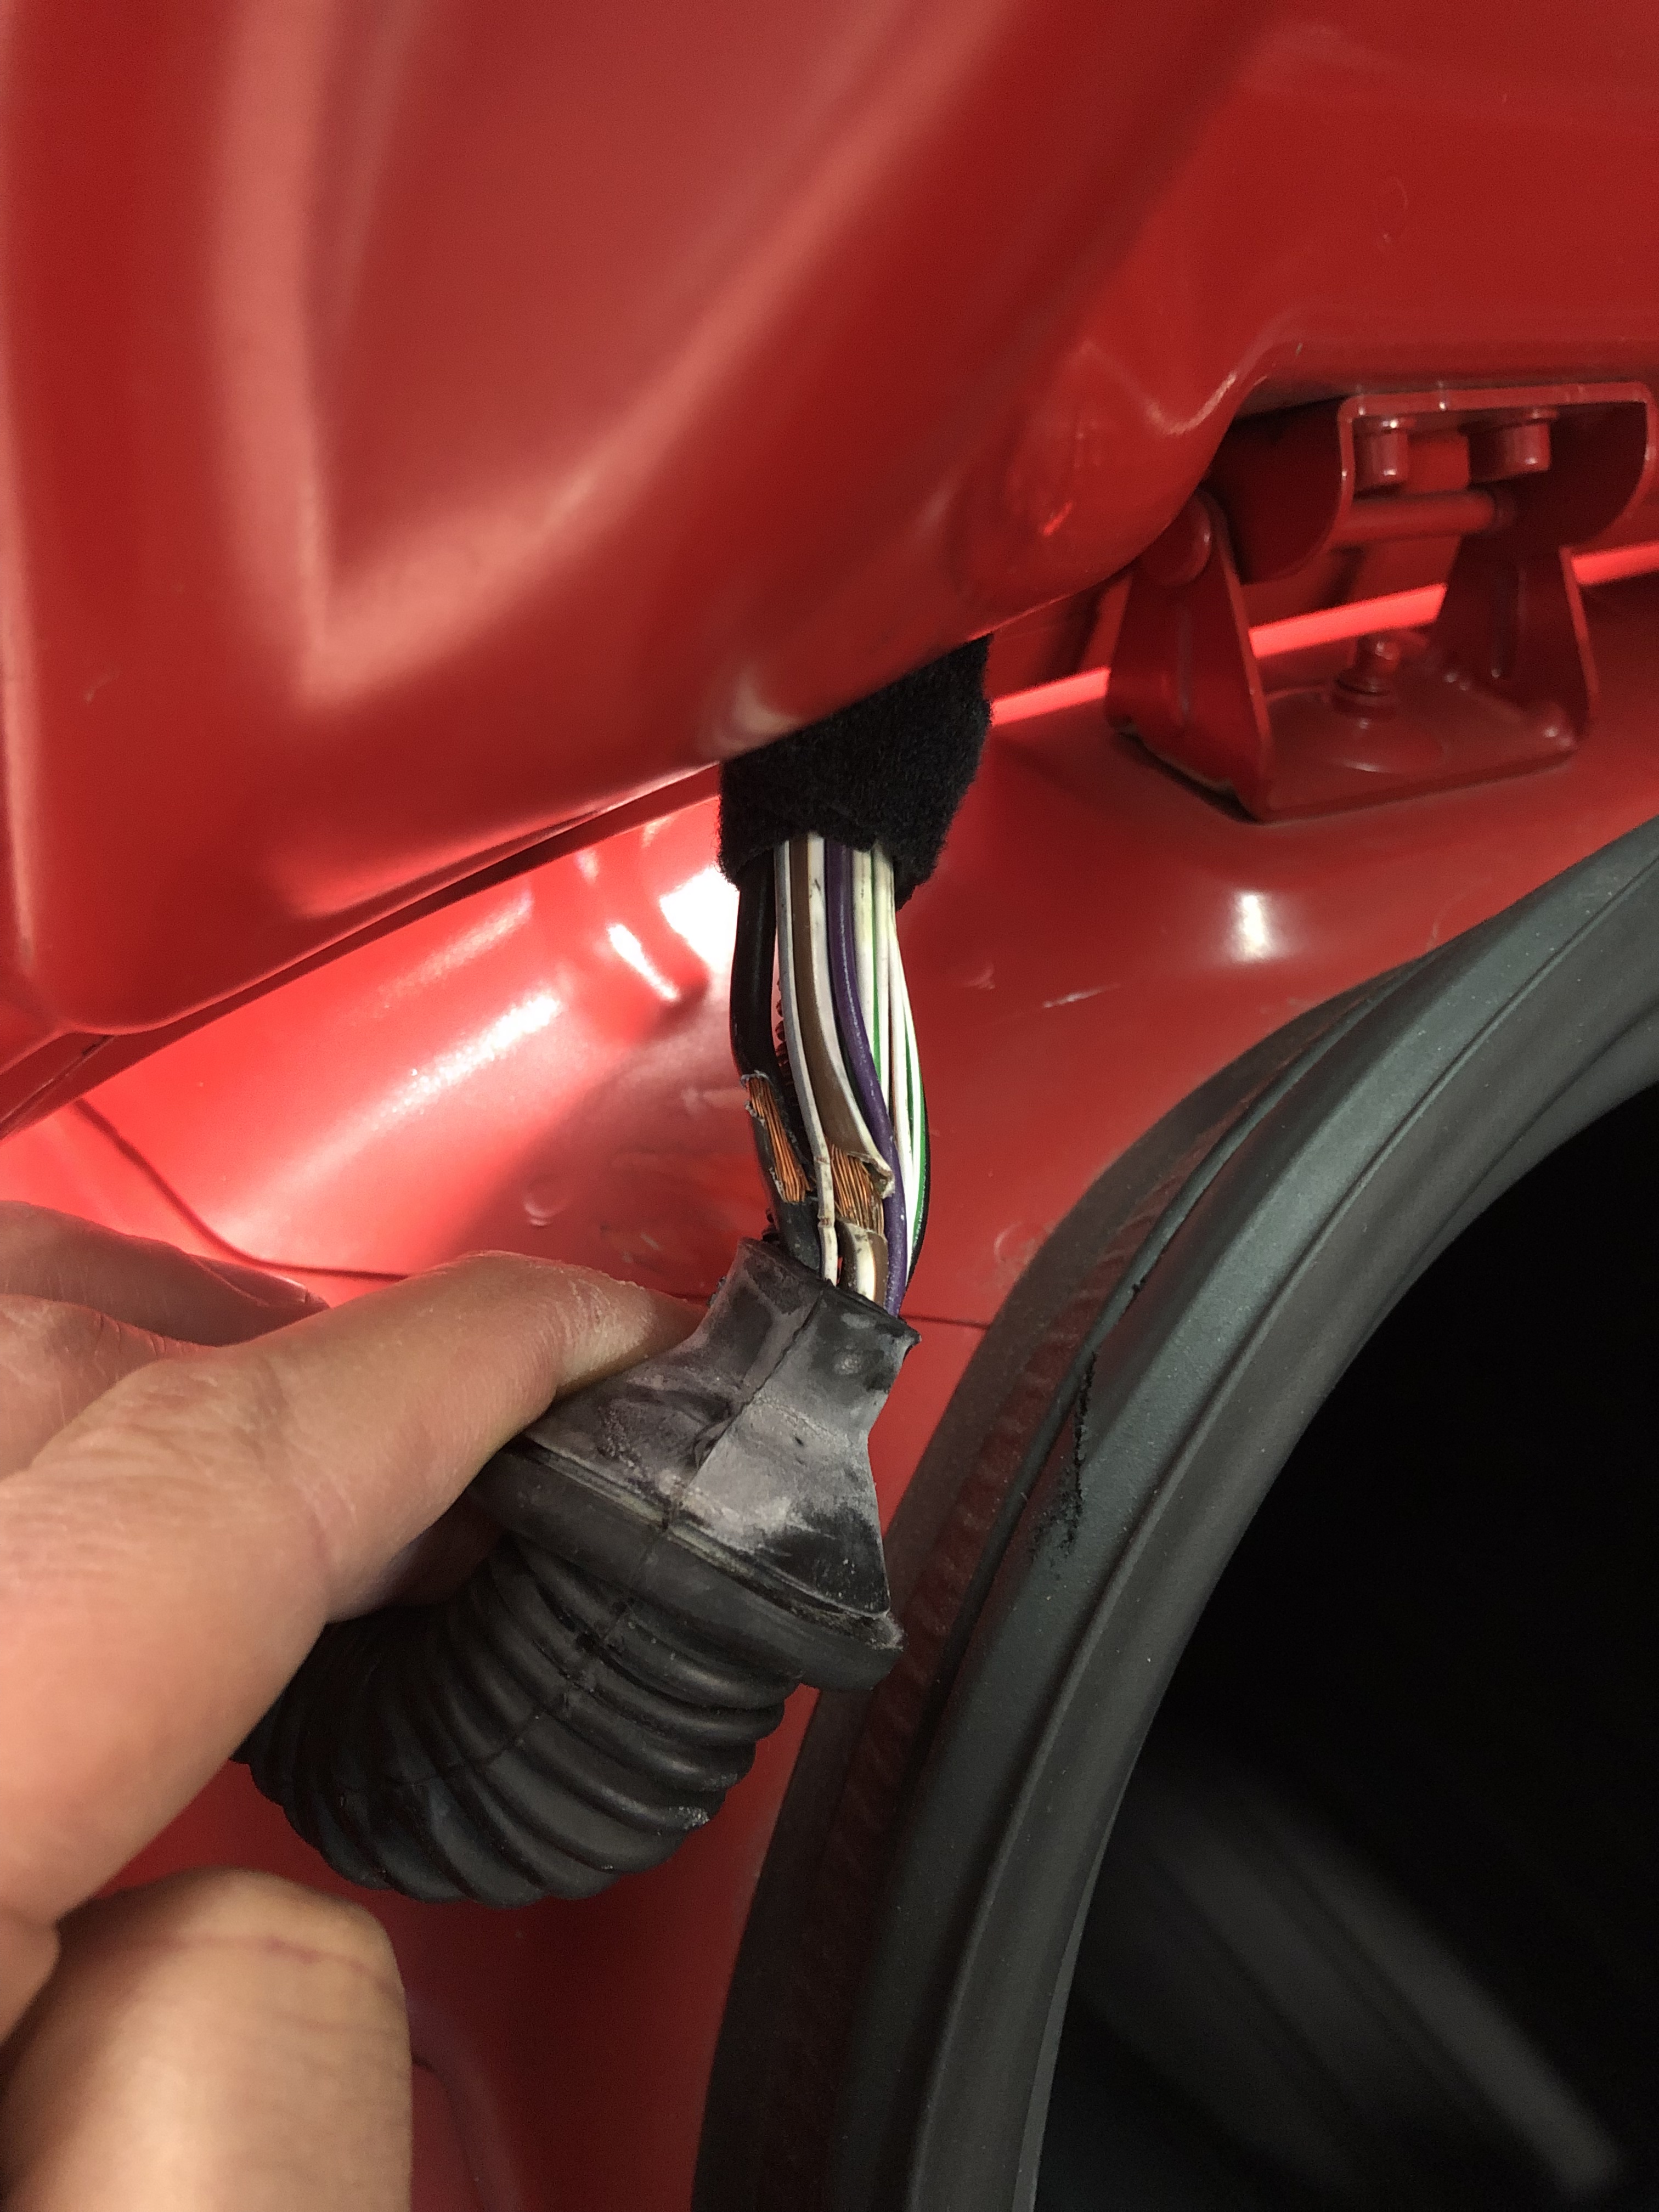
You can see it's already incredibly tight and the wires get frayed from normal use. I was nervous about adding more wiring to the mix. In addition, the repair I made above added more bulk to the wiring inside from the extra insulation.
My first attempt was doing something like this:
It really pained me to have to cut into the rubber boot (thus breaking the water seal) but the USB plug at the end of the cable was very large and not going through. It also looked like it was starting to get damaged from my efforts... and it was starting to get late in the day (which is a super-bad excuse).
I posted the above picture on the OzAbarth Facebook Group and got a big thumbs down on that exposed wiring. One of the members suggested trimming the un-needed plastic on the USB connector to make it smaller and shaping it better using some electrical tape (as below).

With a bit more elbow grease I was able to finally get it through properly.

The dark cable on the right is the camera. You can see the repairs I had previously done to the frayed wiring to fix the license plate lights which makes the whole bundle going through the rubber boot a bit thicker than planned by Fiat.
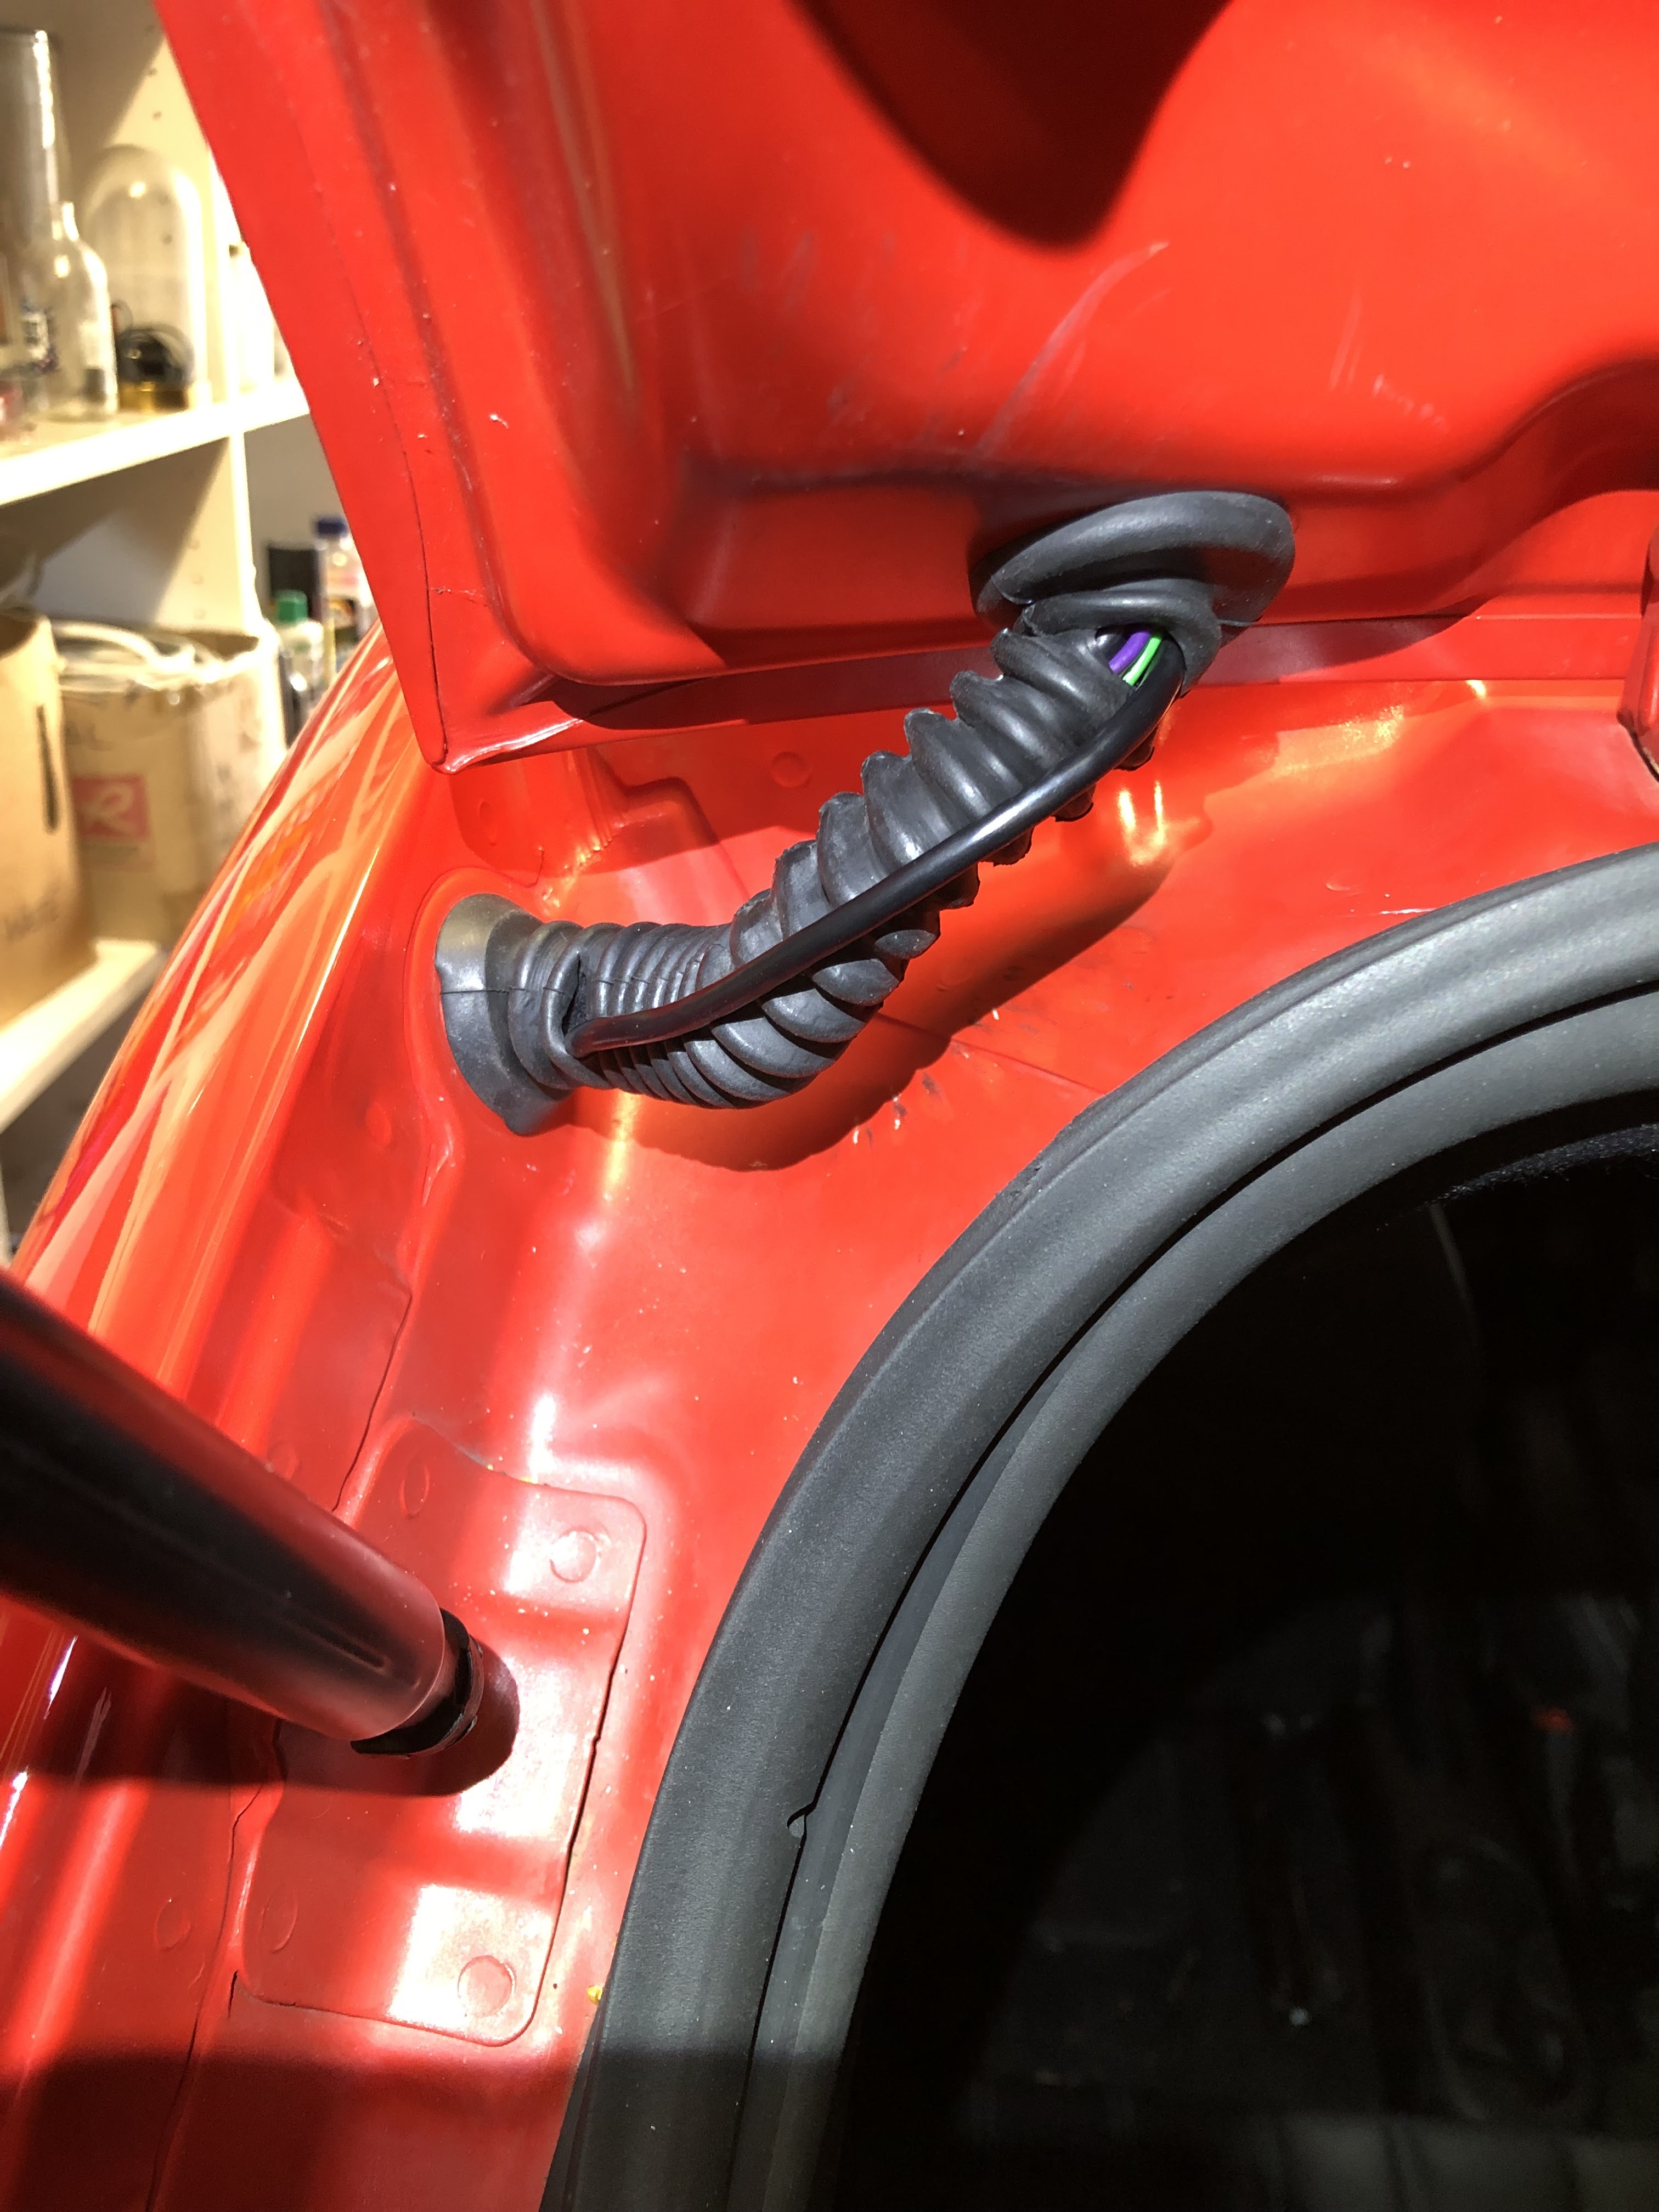
The completed job now has a much tidier appearance. The two "wounds" where I had passed the wire through previously I think will self-seal when I close the boot and they are under compression.

Or maybe I'll try some boot repair product if it's still a problem. Replacing the entire boot is a much bigger job which I'll do when I ultimately do the whole loom repair (as they all seem to eventually need).
Great step by step install! I have an unrelated question to what you're installing, so sorry, but I was wondering if you had a fuse diagram for the fuse box that is pictured in your install, or happen to know which fuse is for the interior lights! Cannot find out anywhere.
ReplyDeleteMany thanks.